As soon as we decided to thru hike the Pacific Crest Trail, I know that I would need a new camera system. Although my Nikon Pro DSLR setup is great to use and produces good image quality, it is also far too heavy to lug over 2650 miles. Although the body itself may just about be possible to bring along for the ride, the pro lenses would also add a lot of weight.
So I started looking around at the other options. The lightest and easiest option would be to go for a point and shoot camera. It would be really light weight, small and easy to use. But being in some of the most beautiful places in the world, with a once in a lifetime opportunity, I really didn’t want to compromise on image quality. SO I started looking around at some of the lighter weight options that still offered good image quality and manual controls.
The natural choice for this middle ground was a mirrorless cameras system. These camera systems do away with the mirror box and prism part of a SLR camera and replace it with a purely digital LCD viewfinder allowing for a smaller and lighter camera. There are a few contenders in this arena that were worth considering;
Olympus Micro Four Thirds System
Panasonic Micro Four Thirds System
Sony NEX System
Pentax Q System
Nikon 1 System
At the time of me deciding what camera to go with, neither Nikon or Pentax had released their mirrorless camera systems, so they were out of the running. I did consider the NEX system as it uses a nice big APS-C sized sensor, which is the same as my DSLR. This should produce great image quality, but it unfortunately also meant that the lenses were somewhat large and heavy compared to the size and weight of the camera. As the point of the exercise was to reduce the size and weight of the whole system, not just the camera it meant that the Sony was also out of the running.
This brought me to the Micro Four Thirds cameras from Olympus and Panasonic. After a lot of research and indecisiveness, I ended up going for the Olympus Option. They had just brought out their new range of cameras, and the one that fitted my needs the best was the Olympus E-P3.
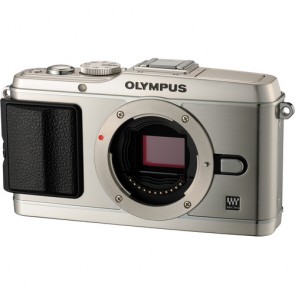
It is a Micro Four Thirds camera, which means a good sized sensor (It is a 2x crop compared to a ‘full frame’ camera) which should produce nice, clean images, even with higher ISO settings. It also has full manual controls, including a ‘bulb’ setting for shutter speed meaning I can do long exposures (more on this further down the page). The auto focus is nice and fast. Olympus claim that the AF is actually faster than that of DSLR cameras. This may be true for a single image, but if complex tracking of a moving subject while shooting multiple images is your requirement, then a DSLR will certainly be better in that regard. But for my needs, the AF was more than adequate. The screen on the camera is also great! It’s big and bright and is actually touch sensitive, allowing you to select the autofocus point by simply touching the live view image. This may seem a bit like a gimmicky feature, but it is one that I have found myself using more and more and works very well.
I bought the body in ‘silver’ because it was, well more ‘bling’! It looks great and is full metal despite its relatively light weight. In order to help protect the body, I have wrapped it in a JNK leather skin. This is a sticky back custom cut leather skin that stick to the outer body the of the camera. Not only does it look great (Now looks like a Leica without the red dot!) but it also helps protect the metal from scratches and small dents. The leather is easily removed if needed, so I can always replace the skin if that gets too scruffy.
As I was getting a new cameras for the Pacific Crest Trail, I thought it was only fair that Sarah got a new camera as well. I ended up buying her a second hand Olympus E-PL1.
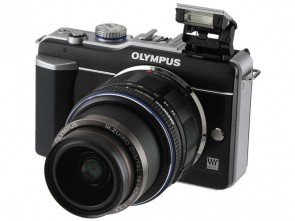
This is lighter than her DSLR setup, but will produce much nice image quality than her little point and shoot. As it is also a Micro Four thirds camera like my E-P3, it means that we can share lenses, remote shutter and other accessories. As with my cameras, I have wrapped Sarah’s E-PL1 with a JNK leather skin. I managed to get hold of a green leather skin which was good as it is Sarah’s favourite colour. Again, this will help to protect the camera from scratches along the way.
Once the decision on the camera body was made, I turned my attention to the lens choice. As any photographer will tell you, the lenses are more important than the camera itself when it comes to image quality. You can buy the worlds most expensive camera, but if you put a rubbish lens on the front of it, it will still produce rubbish images.
I knew I couldn’t go overboard with lenses due to trying to keep the weight down, but I wanted a flexible, as good a quality setup as possible. My two main passions in photography, and what we would be surrounded by on the Pacific Crest Trail are landscapes and wildlife. These two disciplines happen to have very different lens requirements. Landscapes generally require wide lenses where the maximum aperture isn’t a huge concern. Wildlife requires very telephoto lenses with ideally a large maximum aperture in order to keep the shutter speed high in lower light. This meant that I was looking at at least 2 separate lenses to cover the two types of photography without too much compromise.
After even more research, I settled on the Olympus 12mm f2 lens as the landscape lens.
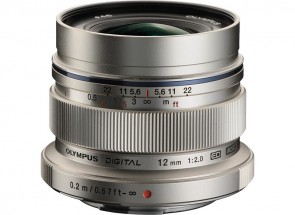
This is a really nice little lens. It is small, but is great quality, both image wise and build quality wise. It is an all metal construction, and even features distance scales when put into manual focus mode. On the Micro Four Thirds system, the 12mm lens is equivalent to a 24mm lens on a full frame camera. Personally I find this a very nice field of view for a landscape lens. it is wide without being overly wide. It produces sharp images, and in testing so far, seems to handle high contrast lighting such as sunsets very well with little to no flaring.
The wildlife lens choice went to the Panasonic 100-300mm f4-f5.6. I did toy with the option of getting the Olympus 75-300mm f4.8-6.7 which is much lighter and smaller. However the maximum aperture of f6.7 on the long end really put me off. It would require bright sunlight when shooting at 300 to not end up with blurry shots. The price was also very high for such a low spec lens.
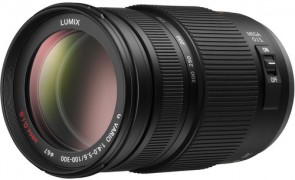
The Panasonic 100-300mm f4-f5.6. should make a decent wildlife lens though. Not quite as fast as the lenses I am used to on DSLR, but good enough to work with, and certainly much lighter. Having said that, there is still a decent chunk of glass in this lens which adds to the weight. I don’t know if I am making the right decision taking a lens like this, but I also know I would regret seeing some amazing wildlife without having the camera equipment to capture it. Now I just need to see a Mountain Lion or Bobcat to justify me carrying the lens!
With the camera and lenses sorted, I turned my attention to camera support. As we will be camping out in the wilderness, going to bed when it goes dark and rising with the sun, I am expecting to see a lot of good sunsets and sunrises. In order to capture these well, the camera need some sort of support to keep it still in the low light.
For my DSLR setup, I have two Gitzo carbon fibre tripods. A large Gitzo 3540XLS, and a smaller much lighter Gitzo GT1541T. Despite this being my usual ‘light weight’ tripod, it is still too heavy for a thru hike. So I started looking at my options for a fit for purpose yet super light tripod. I did consider making a tripod from scratch, but it appears difficult to find a source for leg locks and other smaller parts. (If anyone knows where I can buy small tripod leg locks, please let me know).
Looking at off the shelf options, there seems to be either decent sized but heavy tripods, or light weight but small table type tripods such as the Gorillapod. One option considered was the Zipshot tripod which has legs similar to tent poles. It is light weight and extends to a decent height, but the way the leg sections join together means that there is very little in the way of height adjustments. You either have it to full height or not at all. This would be no good for low angle landscapes with lots of foreground. Eventually though I came across the Velbon V-Pod which is very light weight, but also extends to a good height.
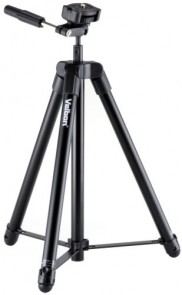
As it comes off the shelf it is actually a pretty good lightweight tripod for the price. But I thought it could do with some improvements, both to the weight and to the functionality, so I set about modifying it. The first step was to remove any excess bits of plastic or metal. The tripod comes wit ha centre column which I proceeded to remove, this also meant I could get rid of the metal stabilising strips. These do add stability and durability to the legs, but as long as I am careful I am confident the tripod will work fine without them. With the centre column gone, it also meant that the inbuilt ballhead was removed. Although this head was very light it was fairly flimsy and didn’t take quick release plates. So in the palce of where the centre column has been, I fixed a screw stud, so third party tripod heads could be fitted.
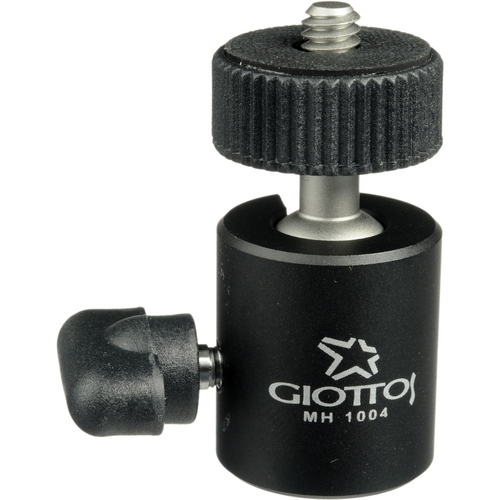
The tripod head I decided to use was the very small, very lightweight Giottos MH1004. This ballhead is normally more suited to something like a flashgun or other accesories, not a full camera. But after using it, it is still strong enough to hold and perform with the Olympus E-P3 and lens attached. It certainly not as smooth my usual RRS BH55 head, but still perfectly acceptable.
To the top of the Giottos MH1004 ballhead, I added the smallest Arca Swiss clamp I could find, which is the Kirk 1″ clamp. Although a little heavier than I would have liked, this mean that I can now very quickly add or remove any camera fitted with an Arca Swiss compatible quick release plate.
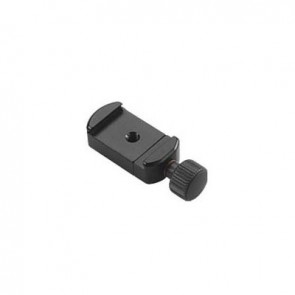
The reason I particularly wanted an Arca Swiss compatible quick release plate on the camera, is due to the camera storage option I decided to go with. Over the years I have experimented with a number of ways of carrying the camera when out hiking. None of them to date have worked successfully. Camera straps are annoying and either cut into your neck or fall off your shoulder. Quick draw straps such at the Blackrapid straps do work somewhat better, but have the annoying habit of getting tangled under your rucksack strap if you take either the camera or the rucksack on and off. Storing the camera in my rucksack tends to mean I can’t be bothered to stop and get the camera out, so I end up with no photos. And finally using a camera bag attached to a hip-belt ends up cumbersome, especially if trying to fit through gates or getting over stiles. But there is another option that I recently came across, the Capture clip by Peak Design.
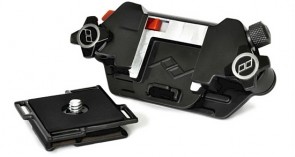
I had considered trying to make something similar myself using quick release clamps, but the Capture Clip does pretty much everything I wanted and does it really well. I have attached it to my left shoulder strap on my rucksack, meaning I can quickly unclip the camera and take a photo without having to stop or take my rucksack off. It hold the camera very securely with very little movement of the camera when walking, and the Capture Clip includes an inbuilt safety release mechanism, so the camera isn’t going to fall off accidentally.
In order to make the perfect system, I have also had to make a few parts myself. Firstly I have made a Cuben Fibre & Neoprene lenscase for the 100-300mm lens when not in use. This started as a Optech neoprene case that I cut apart and added a Cuben Fibre sleeve to make it waterproof. It has a roll top closure to make it totally waterproof during river crossings. The camera also needed a waterproof cover which again was made from Cuben Fibre with a rolltop closure. This was designed in such a way that it fits around the capture clip, so the camera can be used and put away very easily, yet remain in a fully waterproof and dustproof cover. Finally I added lens cap retainers to the cameras, so the lens caps don’t fall off and get lost. I also attached Optech retrieve it retractable wire lines to the cameras and shoulder straps. This acts as extra insurance for the cameras. Even if we drop them while in use, they will be stopped by the thin retractable wire before they hot the ground. So far this carrying system works very well and I am confident it will work reliably on the thru hike.
I will also be bringing a few filters with me. There will be clear B+W UV filters attached to both lenses at all times to help protect them again dirt and scratches. There will also be 2 more creative filters;
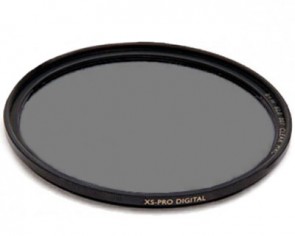
B+W Circular Polarizer. This will help bring out the clouds and make skies really ‘pop’. It can also help to cut reflections in water which I may use for some shots.
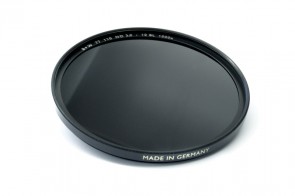
B+W 6-Stop ND Filter. I am a big fan of using ND filters to slow shots right down. I have used a 10 stop ND filter for quite a lot of my work, but I thought I would go for the slightly less extreme 6 stop this time. I will be using it to blur the motion of rivers and streams, as well as adding movement to clouds the and the sky. Expect lots of black and white, long exposure shots!
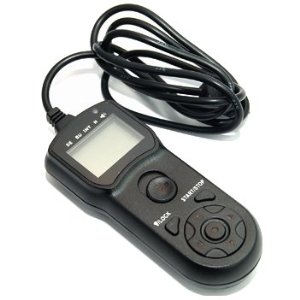
During the Pacific Crest Trail thru hike I want to do a lot more video work. This will involve video diaries, artistic landscape shots, but also timelapse. In order to do timelapse on the Olympus E-P3, I am taking a JJC TM-J Multi-Function Timer Remote Control. This remote shutter includes an intervalometer which allows the camera to take shots at preset intervals to create the timelapse.

And all those video and photos are going to take up a lot of memory. Over the last few months I have been hunting for bargains on SD memory cards and have now amassed enough cards for us to take about 35,000 shots in RAW. That’s 192 photos each day for the 180 days! I think that should be just about enough.
It may seem like a fair amount of equipment to bring, and it probably is but it is also going to allow for maximum flexibility while maintaining great image quality. It might not be as light as a point and shoot camera, but it will be lighter than my full DSLR setup and not be that much worse image quality. I can’t wait to use this kit in anger in some of the most amazing scenery in the world!
DSLvergleich…
[…]Alasdair Fowler Photography[…]…